What are the main factors leading to premature wear of concrete roof tiles?

Concrete Roof Tiles: Factors Leading to Premature Wear

Understanding Concrete Roof Tiles
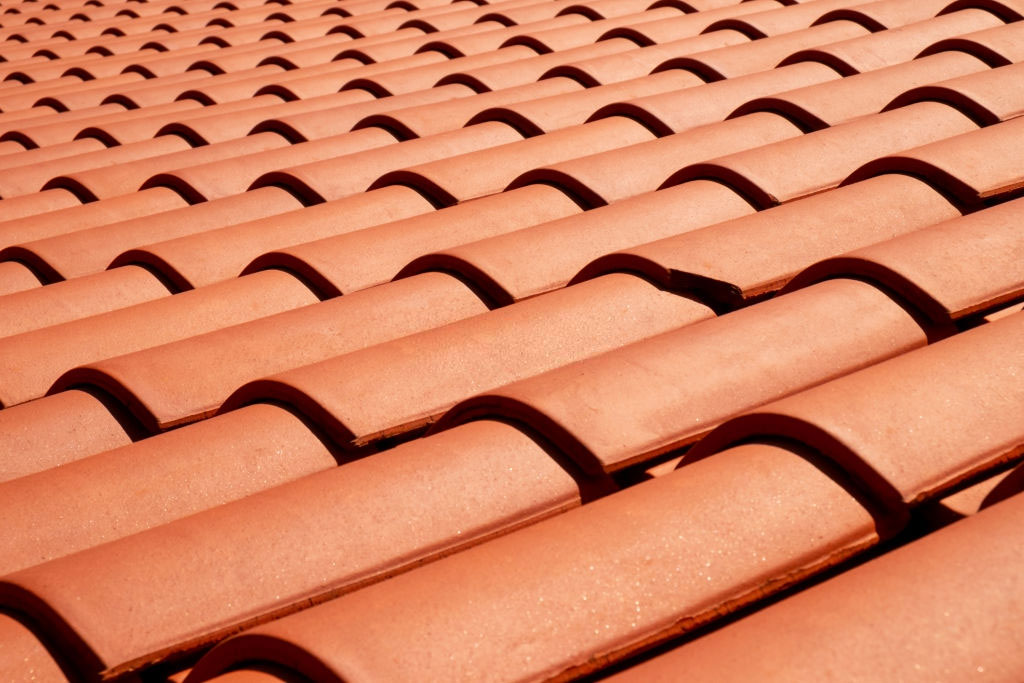
Concrete roof tiles, increasingly popular in Auckland’s diverse suburbs, offer both aesthetics and durability. Made from a mix of sand, cement, and water, they’re known for longevity. However, several factors can cause premature wear.

Environmental Impact on Concrete Roof Tiles
Concrete, while robust, isn’t entirely immune to Auckland’s unique climatic conditions.

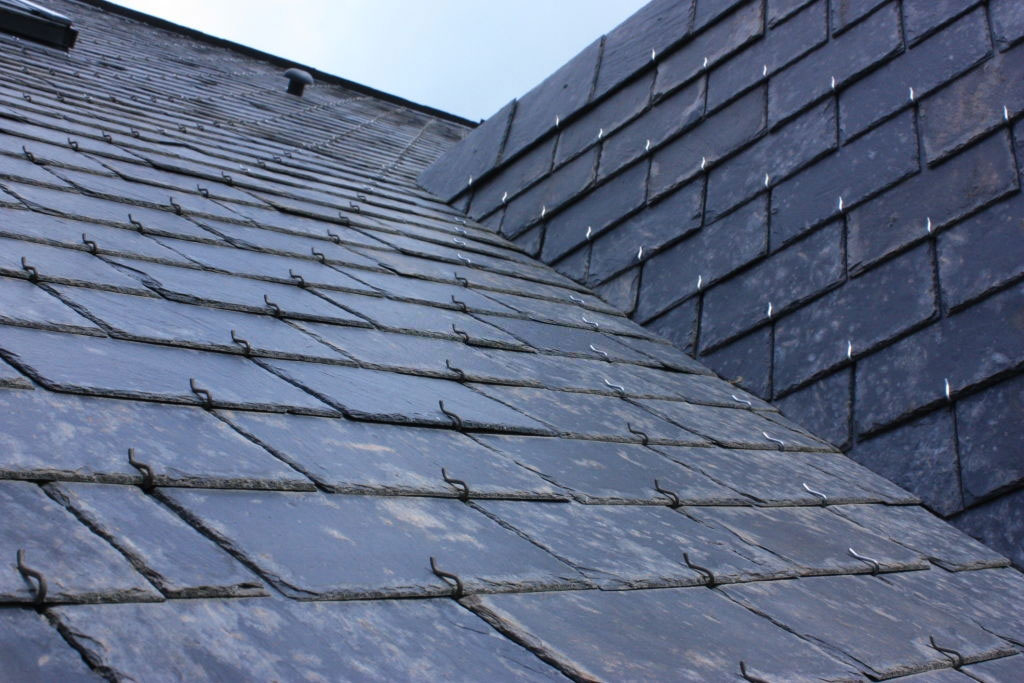
  • Weathering: Regular exposure to Auckland’s rain, especially in regions like East Auckland and North Shore, can gradually erode the tile surface. Additionally, the freeze-thaw cycle can lead to cracking.
  • Salt Exposure: Coastal areas, such as North Shore, expose roof tiles to salt-laden air, accelerating corrosion.

Installation and Maintenance Challenges
Improper practices can be detrimental.

  • Incorrect Installation: An improperly laid tile roof, particularly in areas with stringent regulations like Hobsonville, can be a gateway to leaks and further damages.
  • Lack of Maintenance: Routine cleaning and maintenance are essential. Moss, lichen, and debris accumulation can trap moisture, leading to rot beneath the tiles.

The Cost of Choosing and Maintaining Concrete Tiles
While cost-effective initially, overlooking maintenance can escalate future expenses.

  • Initial Costs: Depending on style and quality, concrete roof tiles can range from NZD $60 to NZD $90 per square meter.
  • Maintenance Costs: Expect around NZD $150 to NZD $250 annually for cleaning and minor repairs.

Auckland’s Regulatory Landscape and Its Impact
Council bylaws can influence tile choices and roof installation procedures.

  • Hobsonville’s Codes: Specific to weight and durability, these codes ensure roofs can withstand strong winds and heavy rain.
  • East Auckland Regulations: With its unique climatic challenges, East Auckland mandates specific water runoff and drainage capabilities in roof tiles.

Sustainable Considerations
Eco-conscious Aucklanders should note:

  • Recyclability: Concrete tiles are largely recyclable, reducing landfill waste.
  • Thermal Properties: These tiles have decent insulation properties, potentially reducing energy costs.

Health and Safety Considerations in Auckland
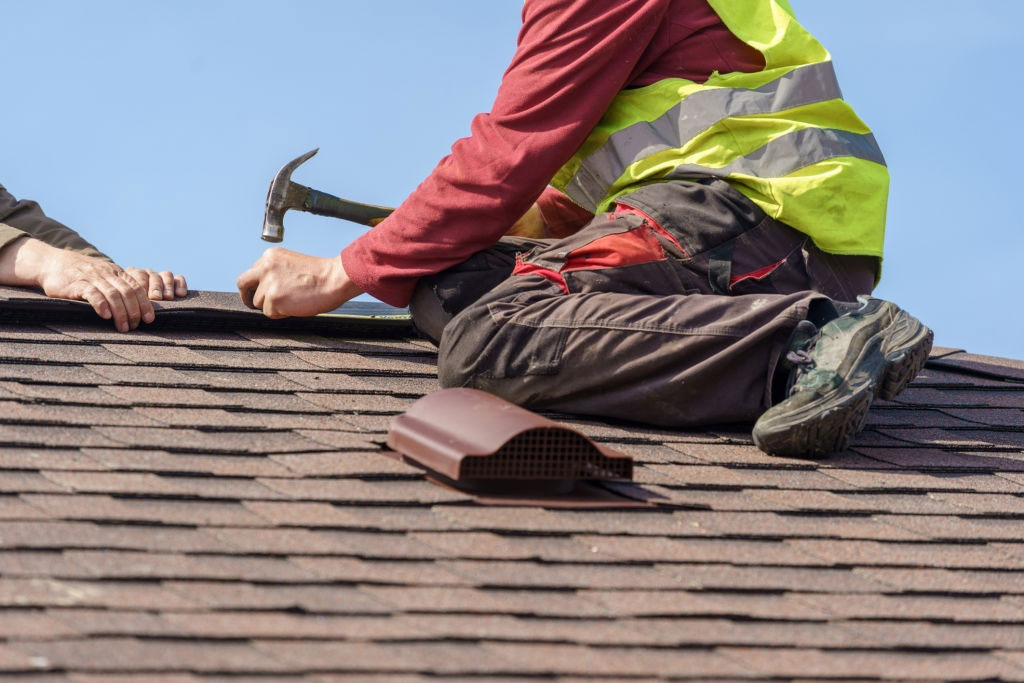
While concrete roof tiles are durable, certain safety protocols should be followed during installation:

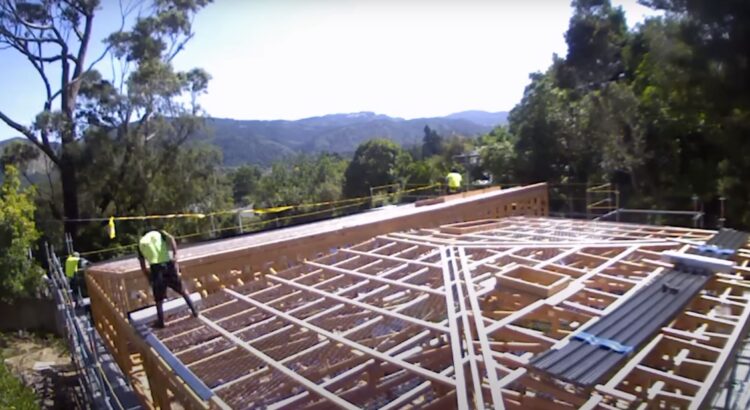
  • Weight Management: Concrete tiles are heavy. Ensuring the roof structure can bear the weight is crucial.
  • Slip Hazards: Given Auckland’s frequent rains, wet tiles can be slippery, demanding secure foothold measures during installations and inspections.

Choosing the Right Roof Tile Variant
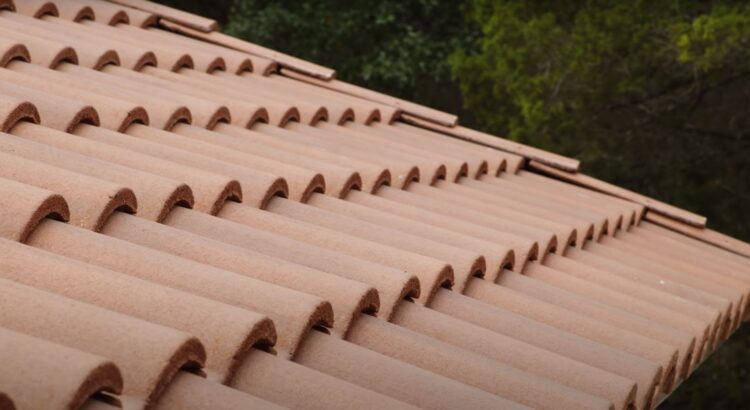
Diverse options abound for discerning Aucklanders.

  • Flat Profile Tiles: Modern and sleek, these are priced around NZD $70 per square meter.
  • Low Roll Tiles: With a subtle curve, they come in at about NZD $80 per square meter.
  • High Profile Tiles: These traditional “S” shaped tiles can cost upwards of NZD $90 per square meter.

Summary Table of Costs Breakdown

Roof Tile VariantApprox. Cost (NZD/sqm)ProsCons
Flat ProfileNZD $70Modern LookLess Drainage Efficiency
Low RollNZD $80Aesthetic CurveSlightly Higher Cost
High ProfileNZD $90+Excellent DrainageHigher Cost

In Closing
While concrete roof tiles are a durable and aesthetic option for Auckland homes, understanding the factors leading to their premature wear is crucial. Proper installation, regular maintenance, and adherence to Auckland’s specific bylaws can ensure your roof remains in prime condition for years.

Concrete Roof Tiles Maintenance Frequently Asked Questions:

How often should I inspect my concrete roof tiles?
Annual inspections are recommended, but after severe weather events, an immediate check is advisable.

What is the primary reason for maintaining concrete roof tiles?
Regular maintenance prevents moisture penetration, ensures longevity, and retains the tile’s aesthetic appeal.

How do I clean concrete roof tiles?
Use a low-pressure water spray and mild detergent. Avoid high-pressure washers as they can damage the tiles.

Is moss and lichen harmful to my tiles?
Yes, they can trap moisture, leading to rot underneath the tiles and reducing their lifespan.

Can I walk on my concrete roof tiles during maintenance?
While concrete tiles are durable, walking on them can cause breakage. Always step on the lower third of the tile, and use a roof ladder or walkway if possible.

Are cracked tiles a common issue?
Cracks can occur due to various reasons, such as physical impact or weather changes. Replace cracked tiles promptly to prevent water ingress.

How do I replace a broken tile?
Lift the tiles above the broken one, remove it, and then slide in a new tile. Ensure it sits securely.

Can I paint my concrete roof tiles?
Yes, but use paints specifically designed for roof tiles. Regularly repainting can also act as an additional protective layer.

Is sealing concrete tiles recommended?
Sealing can offer added protection against moisture and staining but consult with roofing professionals before applying any sealants.

How does weather affect the maintenance frequency?
In areas with frequent rains, like Auckland, regular checks for moss, lichen, and debris are essential. Sun exposure can also fade the tile’s colour over time.

Do concrete tiles become porous with age?
Over time, tiles can lose their protective layer and become more porous, making regular maintenance vital.

How do I address efflorescence on my tiles?
Efflorescence, a white powdery residue, can be washed off. It usually decreases over time as the tile ages.

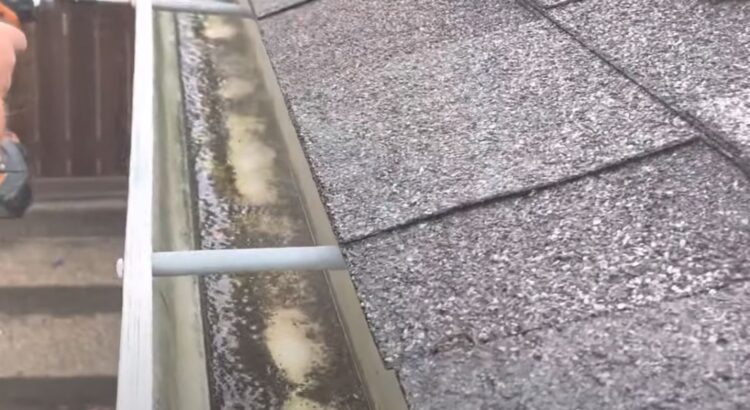
Should guttering be checked during tile maintenance?
Absolutely, ensuring gutters are free from blockages prevents water from spilling back onto the tiles, causing potential damage.

How can I maintain the colour of my tiles?
Regular cleaning, sealing, and occasional repainting can help in retaining the original tile colour.

Does frost affect concrete roof tiles?
Yes, the freeze-thaw cycle can lead to tile cracking, especially if they have become porous.

Are there any specific maintenance tips for coastal homes?
For homes near the coast, regularly checking for salt deposits and cleaning them can help in prolonging tile life.

How long do concrete roof tiles last with proper maintenance?
With diligent maintenance, concrete roof tiles can last 50 years or more.

What’s the cost implication of neglecting tile maintenance?
Neglect can lead to frequent tile replacements, structural damage, and increased costs in the long run.

Is professional maintenance service advisable?
While homeowners can handle basic maintenance, hiring professionals ensures thorough checks and addresses potential issues early on.

Are there eco-friendly cleaning agents for tiles?
Yes, several eco-friendly products are designed specifically for roof tiles, offering effective cleaning without harming the environment.

Do Skylights Need to be Resealed?

The Function and Purpose of Skylights

Skylights have become increasingly popular in many Auckland homes. They provide natural light, reduce the need for artificial lighting, and can even offer an excellent view of the starry skies at night. But like all fixtures, they require maintenance to ensure they remain functional and continue to provide the benefits they were installed for.

Sealing: A Key Aspect of Skylight Maintenance

One crucial part of skylight maintenance is ensuring it remains sealed. The seal prevents water ingress and ensures the skylight is airtight, contributing to the energy efficiency of a home.

Environmental Considerations

From an environmental perspective, a well-sealed skylight can play a part in ensuring a house remains energy efficient. Gaps or cracks in the seal can lead to unwanted drafts or, worse, rainwater leaking in. This not only affects the indoor climate but could also lead to increased use of heating or cooling systems, impacting both the environment and electricity bills.

When Resealing is Necessary

Skylights, like other home installations, undergo wear and tear. Factors like extreme weather conditions, age, and the quality of the original sealant can determine the frequency of resealing.

Skylight Types and Costs

Different skylight designs come with varying costs and potential sealing issues:

  • Fixed Skylights: These are stationary, providing light but no ventilation. Cost: NZD $290-$730.
  • Ventilated Skylights: They can be opened, offering ventilation. More complex mechanisms mean potentially more areas to monitor for sealing issues. Cost: NZD $580-$1,740.
  • Tubular Skylights: Compact and great for smaller spaces. Cost: NZD $290-$580.

Health, Safety, and Auckland Bylaws

Auckland has specific health and safety regulations related to installations in homes. When considering installing or maintaining skylights, it’s essential to ensure all work complies with local guidelines to prevent accidents or future legal complications. One suburb, in particular, Parnell, has specific bylaws concerning the types and specifications of skylights that can be installed due to the unique architectural history of the area.

Common Mistakes

While resealing is a common maintenance task, errors can occur. Here are some pitfalls to avoid:

  • Using the wrong sealant: Not every sealant is suitable for skylights, especially when considering the material of the skylight frame.
  • Incomplete cleaning: Before resealing, the skylight surface needs to be clean to ensure the sealant adheres correctly.
  • Oversealing: Using excessive sealant won’t necessarily make the seal better. Instead, it can create a messy appearance and even cause functional issues.

Cost Breakdown Table

Skylight TypeCost (NZD)
Fixed Skylights$290-$730
Ventilated Skylights$580-$1,740
Tubular Skylights$290-$580

Skylights are a valuable addition to any Auckland home, offering both functional and aesthetic benefits. Regular maintenance, including resealing, is vital to ensure they last and remain efficient.

Frequently Asked Questions on Sealing Skylights

Why is sealing essential for skylights?
Sealing ensures that skylights remain airtight and waterproof, preventing unwanted drafts and potential water leaks, thus ensuring energy efficiency and preventing damage.

How often should skylights be resealed?
The frequency of resealing depends on factors like the quality of the original sealant, age of the skylight, and exposure to extreme weather conditions. Typically, it’s a good idea to inspect skylights every few years and reseal as needed.

Are there different types of skylights that might require different maintenance?
Yes, there are fixed skylights, ventilated skylights, and tubular skylights. Each type may have unique maintenance requirements due to their design and function.

What are the environmental implications of a poorly sealed skylight?
A compromised seal can lead to increased use of heating or cooling systems, affecting both the environment and electricity bills. Properly sealed skylights contribute to a home’s energy efficiency.

Are there Auckland-specific regulations for skylight installations and maintenance?
Yes, specific health and safety regulations apply to skylight installations in Auckland. Additionally, some suburbs like Parnell have unique bylaws concerning skylight types and specifications.

What common mistakes should I avoid when resealing my skylight?
Avoid using the wrong type of sealant, not cleaning the surface adequately before resealing, and applying excessive sealant which can be counterproductive and messy.

How much does it typically cost to install different types of skylights in Auckland?
Fixed skylights typically range from NZD $290-$730, ventilated skylights from NZD $580-$1,740, and tubular skylights from NZD $290-$580.


Key Takeaways:

Skylight Sealing is Essential: Proper sealing is crucial for maintaining the waterproof and airtight nature of skylights, thus ensuring energy efficiency and damage prevention.

Maintenance Frequency Varies: Skylights should be inspected every few years, but the exact resealing frequency depends on various factors, including age, original sealant quality, and exposure to harsh weather.

Different Skylights, Different Needs: The three main types—fixed, ventilated, and tubular—each come with their unique maintenance requirements.

Environmental Considerations: A poorly sealed skylight can negatively impact energy consumption, leading to higher electricity bills and a larger carbon footprint.

Local Regulations Matter: Auckland has specific regulations regarding skylight installations. In suburbs like Parnell, there are unique bylaws that homeowners need to be aware of.

Avoid Common Mistakes: Using the incorrect sealant, insufficient cleaning before resealing, and over-applying sealant are common pitfalls to avoid.

Skylight Costs: In Auckland, after adjusting for current market prices, expect to pay around NZD $290-$730 for fixed skylights, NZD $580-$1,740 for ventilated ones, and NZD $290-$580 for tubular skylights.


How to Fix a Skylight on a Hunter Legend 37

Understanding the Hunter Legend 37 Skylight Design

The Hunter Legend 37 is renowned for its sleek design, with the skylight being one of its standout features. It ensures natural illumination and affords those on board a majestic view of the sky. But like all features exposed to the elements, wear and tear, combined with the harsh marine environment, can lead to some problems over time.

Identifying Skylight Issues When looking into fixing a skylight on your Hunter Legend 37, the first step is to identify the issue:

  • Leakage: A common problem and can lead to extensive interior damage if not addressed.
  • Clouding: Happens due to the wear of the material, preventing clear views.
  • Structural Cracks: These can compromise the boat’s structural integrity.
  • Seal Wear: Often the cause of minor leaks.

Options for Repair and Replacement

1. Resealing: One of the simplest fixes for minor leaks is resealing the skylight. Resealing involves removing the old sealant, cleaning the area, and applying a marine-grade sealant. This not only prevents leaks but also safeguards against potential future damage.

2. Polishing: Clouding is typically caused by scratches or the natural wear of the material. In such cases, using a marine-grade polish can restore clarity.

3. Complete Replacement: In instances where the skylight has major structural issues, replacing the entire skylight might be the most effective solution.

Environmental Considerations

When addressing skylight issues, it’s vital to be environmentally conscious. Opt for eco-friendly cleaning solutions and sealants. Properly dispose of old skylight materials to ensure no harm comes to the marine ecosystem.

Pricing Breakdown

Based on the services required, here’s an estimated breakdown of costs for fixing a skylight on a Hunter Legend 37 in Auckland:

  • Resealing: NZD $240 – $280
  • Polishing: NZD $140 – $180 per session
  • Complete Replacement: NZD $800 – $1100 (excluding the cost of the new skylight)

Note: Prices are subject to change based on the exact specifications and requirements.

Legal Considerations in Auckland

In Auckland, boat maintenance and repairs, including skylight fixes, must adhere to certain legal requirements. It’s important to ensure that all materials used are marine-grade and that any waste is disposed of in an environmentally friendly manner. It’s always wise to consult local guidelines before starting any repair or maintenance work.

Choosing the Right Solution

Your decision on whether to reseal, polish, or replace entirely will depend on the skylight’s current state, your budget, and how long you plan to keep your Hunter Legend 37. While resealing and polishing are cost-effective solutions for minor issues, a complete skylight replacement might be a worthy investment for those looking at long-term use.

Consulting an Expert It’s always a good practice to consult with a local Auckland yacht repair specialist when dealing with skylight issues. Their expertise can provide clarity on the best way forward and ensure the job is done right.

Summary of Costs

ServiceCost Range (NZD)
Resealing$240 – $280
Polishing$140 – $180
Complete Replacement$800 – $1100

In conclusion, while the skylight on a Hunter Legend 37 offers a panoramic view of the Auckland sky, it’s essential to address any issues promptly. This not only ensures a clear view but also maintains the boat’s overall health and value.

Why Use a Roofing Contractor? Understanding Auckland’s Roofing Landscape

The Role of Expertise in Roofing

If you’ve ever gazed at the roofs that adorn houses in suburbs from Mount Eden to Manukau, you’d notice the finesse. Behind that is often the craftsmanship of a roofing contractor. Why? Here’s a look:

  • Training: Roofing isn’t just nailing down shingles. It’s about understanding pitches, angles, and materials. Contractors receive rigorous training to perfect their craft.
  • Experience: With years on the job, they can anticipate and solve problems that might baffle a DIY enthusiast.

Pricing Across Auckland Roofing Services

Roofing costs in Auckland differ based on the service:

  • Repairs: Typically range from NZD $350 to $800, depending on complexity.
  • Reroofing: This process, popular in places like Ponsonby, might set you back between NZD $110-$180 per square metre.
  • Complete Replacement: For homeowners in areas like Parnell, this can range from NZD $150-$350 per square metre, dependent on material and labour.

Safety and Efficiency – Not Just Words

Roofing projects aren’t a walk in the park:

  • Safety Gear: Contractors come equipped with the right gear, reducing the risk of injuries.
  • Warranty: Many roofing materials come with warranties that only apply if installed by professionals.
  • Time-efficient: With their expertise, what takes you a week might just take them a day or two.

Auckland’s Unique Bylaw Requirements

The City of Sails isn’t without its guidelines:

  • Heritage Sites in Grey Lynn: Restoration or replacement here often demands adherence to certain aesthetic and historical standards.
  • High Wind Zones like Henderson: Specific materials and installation techniques might be mandatory.

Understanding local Auckland council bylaws is second nature to contractors. With Auckland’s consent costs averaging NZD $1,500-$10,000, making an error isn’t cheap.

The Environment Matters

Opting for a contractor ensures:

  1. Sustainable Practices: Proper disposal of old roofing materials.
  2. Energy Efficiency: Proper installation leads to better insulation, reducing energy bills and carbon footprints.

Key Takeaways

  • Expertise and experience are invaluable in roofing.
  • Pricing across Auckland’s roofing services varies, but a roof contractor often ensures value for money.
  • Safety, efficiency, and knowledge of bylaws make a contractor’s role indispensable.

FAQs

  • Why might my North Shore home roofing cost differ from one in Otahuhu?
  • Suburb-specific regulations, material availability, and transport costs can influence pricing.
  • Is DIY roofing a feasible way to save costs?
  • While tempting, the risk of errors, injury, and inefficiencies might result in higher long-term costs.
  • How do I know a contractor is following sustainable practices?
  • Ask about their waste disposal methods and if they use environmentally friendly materials.
  • Do contractors provide warranties?
  • Most do. They often provide guarantees on their work, complementing material warranties.
  • How do I stay updated on Auckland’s roofing bylaws?
  • While contractors usually handle this, Auckland Council’s website offers detailed guidelines.

When it comes to roofing in Auckland, cutting corners isn’t an option. Understanding the importance of professionals in this domain, especially amidst the city’s unique requirements and challenges, is crucial for a resilient, compliant, and aesthetically pleasing roof.

How to Fix Sagging Rain Gutters: A Step-by-Step Guide

Sagging rain gutters can be a frustrating problem for homeowners. Not only do they look unsightly, but they can also cause water damage to your home’s foundation and walls. Fortunately, there are several ways to fix sagging gutters and prevent them from happening in the first place.

In this article, you will learn everything you need to know about fixing sagging rain gutters. From understanding the causes of sagging gutters to preventive measures, and various methods of fixing them, this article covers it all. Additionally, safety precautions will be discussed to ensure that you can complete the repairs safely and effectively.

Causes of Sagging Gutters

There are several reasons why rain gutters may start to sag. Here are some of the most common causes:

  • Age: Over time, rain gutters can weaken and lose their shape due to exposure to the elements and wear and tear. This is especially true for older gutter systems.
  • Improper installation: If the gutters were not installed correctly, they may not be able to support the weight of the water and debris that collects in them.
  • Clogs: When gutters become clogged with debris, water can accumulate and put pressure on the gutter system, causing it to sag.
  • Heavy rainfall: Heavy rainfall can put a lot of weight on the gutters, especially if they are already weakened or clogged.

Signs of Sagging Gutters

It’s important to know the signs of sagging gutters so that you can address the problem before it causes damage to your home. Here are some signs to look out for:

  • The gutters are visibly sagging or pulling away from the house.
  • Water is overflowing from the gutters during rainfall.
  • There are water stains on the walls or ceilings of your home.
  • The gutters are making unusual noises, such as creaking or popping.

If you notice any of these signs, it’s important to address the issue as soon as possible to prevent further damage to your home.

When fixing sagging rain gutters, it’s important to take health and safety precautions. Always use a sturdy ladder and have someone hold it for you while you work. If you’re not comfortable working on a ladder, it’s best to hire a professional roofing contractor to do the job.

In conclusion, sagging rain gutters can be a serious problem for homeowners, but by understanding the causes and signs of sagging gutters, you can take steps to prevent further damage to your home.

Preventive Measures for Sagging Gutters

Sagging gutters can be a major problem for homeowners. Not only can they cause damage to the home, but they can also be a safety hazard. Fortunately, there are preventive measures that can be taken to prevent sagging gutters from occurring.

Regular Gutter Inspection

Regular inspection of gutters is important to prevent sagging. Gutters should be inspected at least twice a year, once in the spring and once in the fall. During the inspection, homeowners should look for signs of damage or wear and tear, such as cracks or rust. They should also look for signs of sagging, such as gutters that are pulling away from the house or have gaps between the gutter and the roof.

Proper Gutter Installation

Proper gutter installation is another important preventive measure that can be taken to prevent sagging gutters. Gutters should be installed by a professional who has experience with gutter installation. The gutter should be installed with the correct slope to ensure that water flows properly and does not pool in the gutter. The gutter should also be secured properly to the roof to prevent it from pulling away from the house.

When installing gutters, it is important to choose the right type of gutter for the home. There are several types of gutters available, including aluminum gutters, copper gutters, and vinyl/ PVC gutters. Each type of gutter has its own pros and cons, and homeowners should choose the type that is best suited for their home and their budget.

In addition to regular inspection and proper installation, homeowners should also take steps to prevent damage to their gutters. This can include cleaning gutters regularly to prevent clogs and using gutter guards to prevent debris from entering the gutter.

Health and Safety

When inspecting or repairing gutters, it is important to take health and safety into consideration. Homeowners should wear protective gear, such as gloves and safety glasses, to protect themselves from injury. They should also use a sturdy ladder to access the gutters and avoid standing on the roof, which can be dangerous.

In conclusion, preventive measures such as regular inspection and proper gutter installation can help prevent sagging gutters. Homeowners should also take steps to prevent damage to their gutters and be aware of the causes of sagging. By taking these measures, homeowners can ensure that their gutters remain in good condition and protect their home from water damage.

Fixing a Sagging Gutter

If you’re experiencing a sagging gutter, you’re not alone. This problem can happen to anyone, especially those living in areas with heavy rain or snow. In this section, we will discuss how to fix a sagging gutter and prevent it from happening again.

Tools Needed

Before you get started, you’ll need to gather a few tools. Here’s what you’ll need:

  • Ladder
  • Safety glasses
  • Work gloves
  • Screwdriver
  • Drill
  • Screws
  • Brackets
  • Sealant

Step-by-Step Guide

  1. Safety first! Make sure you have a sturdy ladder and wear safety glasses and work gloves.
  2. Identify the cause of the sagging. Sagging gutters can be caused by a variety of reasons, including clogs, damaged brackets, and worn-out sealant. Once you’ve identified the cause, you can proceed with the appropriate repair.
  3. Clean out the gutters. If the sagging is caused by clogs, start by cleaning out the gutters. Use a scoop or a trowel to remove debris and flush the gutters with water.
  4. Replace damaged brackets. If the brackets are damaged or missing, replace them with new ones. Use a drill to attach the new brackets to the fascia board.
  5. Use screws to secure the gutter to the brackets. Make sure the screws are long enough to penetrate the fascia board and the bracket.
  6. Apply sealant. Apply a bead of sealant along the inside of the gutter where it meets the bracket. This will help prevent water from leaking.
  7. Test the gutter. Once you’ve completed the repair, test the gutter by running water through it. Make sure there are no leaks and that the water flows freely.

Remember, safety is key when working on gutters. Always use a sturdy ladder and wear safety glasses and work gloves. If you’re not comfortable working on a ladder, consider hiring a professional roofer to do the job.

In conclusion, fixing a sagging gutter is a simple process that can be done with the right tools and a little know-how. By following these steps, you can prevent further damage and keep your gutters functioning properly.

Key points:

Causes of Sagging Gutters

Sagging gutters can be caused by a variety of factors, including:

  • Clogged gutters: When gutters become clogged with debris, the weight of the debris can cause the gutters to sag.
  • Improper installation: If the gutters were not installed correctly in the first place, they may begin to sag over time.
  • Age: Over time, gutters can become worn and begin to sag.
  • Heavy rainfall: If the gutters are not able to handle heavy rainfall, the weight of the water can cause the gutters to sag.

Methods for Fixing Sagging Gutters

There are several methods for fixing sagging gutters, including:

  • Adding hangers: If the gutters are sagging due to a lack of support, adding hangers can help to provide additional support.
  • Replacing brackets: If the brackets holding the gutters in place are damaged, replacing them can help to fix the sagging.
  • Repairing leaks: If there are leaks in the gutters, repairing them can help to prevent further sagging.
  • Replacing the gutters: If the gutters are beyond repair, replacing them may be necessary to prevent further damage to the home.

Health and Safety Considerations

When fixing sagging gutters, it is important to consider health and safety. Always use a sturdy ladder and have someone hold it steady while working on the gutters. Wear gloves to protect your hands from sharp edges and debris.

If the gutters are high up and difficult to access, it may be best to call in a professional to ensure that the work is done safely and correctly.

Conclusion

In conclusion, fixing sagging rain gutters is a crucial task that should be done as soon as possible to avoid further damage to your home. The causes of sagging gutters are numerous, ranging from improper installation to clogging and rusting. It is important to identify the cause of the sagging before attempting any repairs.

There are several methods to fix sagging gutters, including adding support brackets, replacing damaged sections, and cleaning out debris. It is important to take proper safety precautions before attempting any repairs, such as using a sturdy ladder and wearing appropriate safety gear.

Regular maintenance of your gutters can prevent sagging from occurring in the first place. This includes cleaning out debris, checking for rust and damage, and ensuring proper installation. If living in Auckland and you are unsure about how to properly maintain your gutters, it is recommended to seek professional assistance. Give the team at My Roofers Auckland a call today to see how they can help.

Overall, fixing sagging gutters is a task that should not be overlooked. By taking proper precautions and identifying the cause of the sagging, you can ensure the longevity and functionality of your gutters, protecting your home from water damage.

What Materials Do You Use For Roofing in Auckland?

Roofing is an important part of any home. It provides protection from the elements and helps maintain a comfortable temperature inside your house. Knowing the various materials used for roofing can help you make an informed decision when it comes time to replace or repair your roof.

Metal Roofing

Metal roofing is a popular choice for many homeowners as it is strong and durable. It can come in different colors, styles, and materials to give you the look you want for your home. It’s also easy to install, making it an attractive option for DIYers and professional roofers alike. Metal roofing is also energy-efficient, helping to keep homes cooler in the summer and warmer in the winter.

Plus, it lasts longer than most other roofing materials and can withstand extreme weather conditions such as hail, high winds, and snow. All of these features make metal roofing a great choice for any homeowner looking for a reliable roof that will last for years to come. Additionally, metal roofs require less maintenance compared to other types of roofing materials like asphalt shingle or tile roofs. With proper care and maintenance, a metal roof can last up to 50 years or more. This makes it a great investment that will save you money over time by avoiding costly repairs or replacements down the road.

Clay Tile Roofing

Naturally, when considering roofing materials, clay tile roofing is often a popular option. This type of roofing offers superior durability and a long-lasting lifespan that can exceed up to 100 years. Because it is made from natural clay, it is also highly resistant to heat and fire, making it an ideal choice for those looking for extra protection. Additionally, the material can be produced in various shapes and sizes, which helps create interesting designs and patterns on the roof.

Clay tile roofing also has excellent insulation properties, allowing homeowners to save money on energy costs while still keeping their homes comfortable. It’s easy to see why this type of roofing has become so popular over the years; its many benefits make it a great investment for any homeowner.

Asphalt Shingle Roofing

Moving away from clay tile roofing, another popular roofing material is asphalt shingle roofing. Asphalt shingles are the most commonly used roofing material in America and are made of a fiberglass mat covered with asphalt and mineral granules. They’re affordable, easy to install, and can last between 15-30 years, depending on the quality of the shingle and how well they’re maintained.

There are many different types of asphalt shingles available, ranging from basic 3-tab to more expensive architectural shingles that have a variety of shapes, sizes and colors. Asphalt shingle roofs can be installed on almost any structure, although they don’t do as well in areas that experience extreme temperatures or climates. It’s important to keep them clean and free from debris so that water can flow off the roof properly. Regularly inspecting your roof for signs of damage will help ensure it will last its full lifespan.

Additionally, it’s best to hire a professional contractor to install your asphalt shingle roof properly since it requires precision and experience. There are a number of materials available for roofing, each with its own advantages and disadvantages. Metal roofing is very durable and offers energy efficiency in the form of reflectivity. Clay tile roofing is also a great option if you want a classic look with good insulation properties. Asphalt shingle roofing is an economical choice that can last for decades with proper maintenance. Ultimately, the best option for your needs will depend on your budget and desired aesthetic.

Check roofing video for more information.

What type of roof is best for my home in Auckland?

If you live in Auckland, you’re probably well aware of the weather conditions that come with living in the area. With high winds, heavy rain, and plenty of sun, you need a roof that can keep up with all the weather changes. But with so many options out there, it can be hard to decide which type of roof is the best for your home in Auckland.

Metal Roofs

Metal roofs are a popular choice for homeowners in Auckland. They are lightweight, durable, and come in a variety of styles and colors. Metal roofs are also fire-resistant, which is especially important if you live in an area prone to bushfires. They also hold up well against strong winds, making them a great option for Auckland’s windy climate. The biggest downside to metal roofs is the cost. While they are more expensive than other types of roofs, the long-term savings make them a great investment.

Tile Roofs

Tile roofs are a popular choice for homes in Auckland due to their durability and longevity. They are also fire-resistant, making them a great choice for areas prone to bushfires. Tile roofs are also a great choice for homes in Auckland because they are designed to deflect UV rays and keep your home cool in the summer. The downside to tile roofs is that they can be quite heavy, which can put a strain on your home’s structure.

Slate Roofs

Slate roofs are another popular choice for Auckland homeowners. They are extremely durable, fire-resistant, and come in a variety of colors and styles. Slate roofs also have a unique look that can add to the charm of your home. The downside to slate roofs is that they are quite expensive, but the long-term savings make them a great investment.

Asphalt Shingle Roofs

Asphalt shingle roofs are a popular choice for Auckland homeowners due to their affordability, durability, and range of colors and styles. Asphalt shingles are also relatively lightweight, making them easier to install than other types of roofs. The downside to asphalt shingles is that they don’t hold up as well against strong winds and heavy rain as some other types of roofs.

Terracotta Roofs

Terracotta roofs are a great choice for homes in Auckland. Terracotta is a type of clay that is fired at high temperatures, making it extremely durable and fire-resistant. Terracotta roofs are also attractive, with a range of colors and styles to choose from. The downside to terracotta roofs is that they can be quite heavy, so you’ll need to make sure your home’s structure can support the weight.

No matter which type of roof you choose, make sure you get it inspected regularly to ensure it is up to code and can withstand the weather conditions in Auckland. With the right roof, you can keep your home safe and looking great for years to come.

Check roofing contractors for more information.

How Long Does It Take To Install A New Roof in Auckland?

Installing a new roof is no small task. It’s a big job that requires careful planning and preparation to ensure it’s done properly. But how long does it take to install a new roof?

Factors Affecting Installation Time

The amount of time it takes to install a new roof depends on a number of factors. One major factor is the size of the roof. A larger roof will take longer to install than a smaller one as there is more material that needs to be laid down. The weather also plays a role in installation time as rain, wind, and excessive heat can slow down the process. If these conditions are present during the installation period, it may take longer for the roof to be completed.

Additionally, the complexity of the roof design can impact installation time as intricate designs require more labor and materials. All of these factors should be taken into account when estimating how long it will take to complete a new roof installation. Ultimately, an experienced contractor should be able to give an accurate timeline for completing the project.

Ways To Speed Up The Process

Installing a new roof can be a long and labor-intensive process, but it doesn’t have to take weeks or months to complete. There are a few ways that homeowners can speed up the installation of their new roof. First, having all the necessary materials ready for the contractors before they arrive can help reduce delays and save time on the job. Additionally, hiring experienced professionals who understand how to properly install roofs also reduces the amount of time that it takes to complete the job. With these simple steps, homeowners can significantly reduce the amount of time it takes for their new roof to be installed.

Cost Considerations

When installing a new roof, speed is of the essence. Taking the time to properly prepare the area and plan out the process can help ensure that the job is done quickly and correctly. Additionally, having quality materials on hand and investing in the right tools can also help to make the installation go more smoothly. In addition to speeding up the process, cost considerations are also important when planning for a new roof installation.

Different types of materials have different price points, so it’s important to do research ahead of time to find an option that works within your budget. It may be helpful to get quotes from multiple contractors as well, as this can give you a better idea of what kind of costs you’ll be looking at. Ultimately, finding an option that fits both your timeline and your budget will help you get exactly what you need for your roof installation project.

Installing a new roof is a big job, and there are several factors that can affect how long it takes. Knowing these factors beforehand and taking steps to speed up the process can help ensure the job gets done in a timely manner. Additionally, it’s important to consider the cost of labor and materials when deciding on the best way to install your new roof. All in all, installing a roof can be costly but with proper planning and preparation, you’ll be able to get your new roof installed efficiently and effectively.